Taste of the week: Chickpea and sesame dip

A  neighbor in Provence grows wonderfully rich-tasting chickpeas, which I turn into tangy, lemon-flecked dips, accompaniments to poultry dishes, or to falafel. For the most delicious hummus, cook your own dried chickpeas; the canned ones often taste tinny and are not nearly as densely flavored.

Equipment: A food processor or a blender.

2 1/2 cups home-cooked chickpeas, drained (reserve liquid)
2 plump, moist garlic cloves, peeled, halved, and green germ removed
3 tablespoons freshly squeezed lemon juice (or to taste)
3 tablespoons tahini (sesame paste)
1/2 teaspoon fine sea salt
2 tablespoons best-quality sesame oil
1/4 cup cilantro leaves
1/8 teaspoon paprika  

Set aside 1/2 cup of the chickpeas for garnish. In the bowl of a food processor or a blender, mince the garlic. Add the remaining 2 cups of chickpeas, the lemon juice, tahini, salt, and 1 tablespoon of the oil. Blend until smooth, adding the reserved cooking liquid if necessary to make a smooth puree. Taste for seasoning.  Spoon the dip into a large, shallow bowl, and garnish with the reserved 1/2 cup of chickpeas, a drizzle of oil, cilantro, and paprika. Serve. (The dip can be stored, without the garnish, covered and refrigerated, for up to 3 days.)  

Makes 2 cups

This recipe was first published in The French Kitchen Cookbook.

Taste of the Week: Monday night beef salad with green beans, avocado and arugula

Walter often cooks his famed Salt and Pepper Steak on Sunday nights, and we always hope for enough leftovers to prepare this salad as a meal the following day.

Equipment: A small jar with a lid; a 5-quart (5 l) pasta post fitted with a colander.

Dressing
2 tablespoons minced fresh tarragon leaves
2 teaspoons tarragon-flavored mustard*
2 tablespoons freshly squeezed lemon juice
1/2 cup (125 ml) extra-virgin olive oil
2 tablespoons capers in vinegar, drained
6 cornichons, cut crosswise into thin rings

Salad
1 tablespoon coarse sea salt
8 ounces (250 g) green beans

10 ounces (300 g) cooked beef rib steak, cubed (see Walter's Salt and Pepper Steak recipe below)

4 scallions, white and green parts, peeled and cut into thin rings

A large handful (about 2 ounces; 60 g) arugula, rinsed and dried
10 firm cherry tomatoes, halved lengthwise  
1 large ripe avocado, halved, pitted, peeled, and cubed  


1.    In the jar, combine all the dressing ingredients. Cover and shake to blend. Taste for seasoning.

2.    Fill the pasta pot with 3 quarts (3 l) of water and bring to a rolling boil over a high heat. Prepare a bowl of ice water for an ice bath.

3.    Add the coarse sea salt and the beans to the boiling water and blanch until crisp-tender, 3 to 4 minutes. (The cooking time will vary according to the size and tenderness of the beans.) Immediately remove the colander from the water, allow the water to drain from the beans, and plunge the beans into the ice water so they cool down as quickly as possible. (The beans will cool in 1 to 2 minutes. If you leave them longer, they will become soggy and begin to lose flavor. ) Drain the beans and wrap them in a thick towel to dry. (The beans can be cooked up to four hours in advance. Keep them wrapped in the towel and refrigerate, if desired.)

4.    Place the beef in a large bowl. Add just enough dressing to lightly coat the meat. Toss to blend. Add the beans and scallions and add just enough dressing to lightly coat the ingredients. Tear the arugula into bite-size pieces. Add the arugula, tomatoes, and avocado to the bowl and add just enough dressing to lightly coat the ingredients. Taste for seasoning. Serve.

 
4 servings

* I favor Edmond Fallot’s Tarragon Dijon Mustard, which can be found in Patricia’s Pantry on my Amazon Store.


Walter's Salt and Pepper Steak

Equipment: A griddle, seasoned cast iron skillet, or heavy-duty skillet.

1 bone-in beef rib steak, about 2 pounds (1 kg), about 1-inch (2.5 cm) thick
2 tablespoons coarse sea salt
Coarse, freshly ground black pepper
Fleur de sel
Lemon wedges, for serving  

1.    Remove the meat from the refrigerator at least 30 minutes before cooking.

2.    When you are ready to cook the beef, preheat the griddle or skillet over high heat for 2 minutes. Scatter the coarse sea salt on the griddle and heat until the salt “dances,” or begins to pop, about 2 minutes. Then add the meat, unseasoned, and cook for 4 minutes on one side. Turn the meat, season the seared side with pepper and cook for 4 minutes more for rare meat, or cook to desired doneness.

3.    Transfer the meat to a cutting board. Season the second side with pepper and season both sides with fleur de sel. Tent the meat loosely with foil to prevent the surface from cooling off too quickly. Let it rest for 5 to 10 minutes.

4.    To serve, carve into thick slices. Serve with lemon wedges. 

4 servings

The secret: Three rules here: sear, season, rest. Searing caramelizes the sugar and browns the proteins on the surface of the meat, resulting in more intense flavors and an attractive crust. The salt does help begin to season the meat, but because the pan is extremely hot, the meat begins to sear immediately, forming a crust that prevents the salt from drawing moisture from the steak. The final seasoning makes for meat that tastes seasoned not salted. Resting allows the juices to retreat back into the meat, resulting in beef that is moist and tender, not dry.

These recipes were first published in The French Kitchen Cookbook. All rights reserved. Do not reproduce without permission.

Chestnut honey squares that satisfy in one bite

Time after time, the students in my cooking classes in Paris or Provence tell me “I don’t bake.” These same students are often delighted when I assign them a dessert, for they know that they will at least learn to make one wonderful sweet. I think that they also secretly hope that by week’s end, they may actually get over their fear of baking.

When it comes to cooking, my philosophy is to keep it simple and make sure it’s delicious. One foolproof recipe in my repertory is for chestnut honey squares, a confection that satisfies in a single bite. It can be made ahead, does not require exotic equipment, is relatively simple (you pat the crust in the pan) and it’s beautiful, with a glistening glaze. Stored in an airtight container, it stays fresh for days.

The inspiration came from the Paris bakery Moulin de la Vierge. I was sampling a wide selection of sweets, and as I bit into the honey-kissed square, I stopped, almost stunned at how special it was, something you could eat out of hand with a bit of crunch and only a hint of sweetness.

The crust is butter-rich but not too much so, an easy blending of flour, almond meal, unrefined sugar, butter, an egg yolk, vanilla extract and a touch of fine sea salt to brighten the flavors.

A quick pulse in the food processor with a bit of water, and the pastry is ready to pat in the pan and bake. We all think our ovens are sometimes temperamental; I love that this crust will turn out just fine at a range of temperatures.

I find that most home cooks tend to underbake, especially pastry, so I instruct my students to make sure the pastry is golden and crisp, not pale and limp. I don’t even mind if it is really, really dark. As my friend Eli Zabar likes to say, “Burnt is best!” I might not go that far, but it must be fully baked.

The topping comes together in minutes while the pastry bakes. Sweetened with just 2 tablespoons of intensely flavored honey, like chestnut honey, it is a simple blend of butter, sliced almonds, cubed candied orange or lemon peel, and vanilla extract, just melted in a saucepan over low heat. The darker honey is crucial; you can find it online if not in a specialty store.

Once the pastry is golden, spread on the topping, bake until deep golden, remove from the oven and let cool. I cut it into tiny squares (32 is a good number) to produce a bite-size dessert.

I am thinking of creating a variation with the flavorful organic Sicilian pistachios I find at my local co-op, toasting the nuts, grinding some to a powder and chopping the rest for the topping. I’ll make it with the organic lavender honey from our farm in Provence. It will glow, and I’ll pat myself on the back.

This article was originally published by the  New York Times, December 17, 2013 Photo by Jeff Kauck

I share this recipe from my latest book, The French Kitchen Cookbook: Recipes and Lessons from Paris and Provence.

CHESTNUT HONEY SQUARES

For the Pastry:

120 grams (3/4 cup) unbleached all-purpose flour

45 grams (1/2 cup) almond meal (see note)

35 grams (3 tablespoons) sugar, preferably unrefined vanilla sugar (see note)

1/2 teaspoon salt, preferably fine sea salt

6 tablespoons unsalted butter, chilled and cut into cubes

1 large egg yolk

1/2 teaspoon pure vanilla extract

For the Topping:

4 tablespoons unsalted butter

80 grams (1 cup) sliced almonds

30 grams (1/3 cup) candied orange or lemon peel, cut into tiny cubes

65 grams (1/3 cup) sugar, preferably vanilla sugar

2 tablespoons chestnut honey or other intensely flavored honey

1/2 teaspoon vanilla extract

Preparation

  1. Heat oven to 400 degrees. Line a 9 1/2-inch-square baking pan with parchment, letting it hang over the sides for easier removal later.
  2. Prepare the pastry: In a food processor, combine flour, almond meal, sugar and salt. Pulse to blend. Add the butter and pulse until the mixture resembles coarse crumbs. Add egg yolk, vanilla and 1 tablespoon of water. Pulse to incorporate. Add 2 to 3 tablespoons of water through the feed tube, tablespoon by tablespoon, pulsing until just before the pastry forms a ball. You may not need all the water.
  3. Turn the dough out into the prepared baking pan. Press the dough evenly into the bottom of the pan. Place in the oven on the center rack and bake until the pastry begins to brown around the edges, 12 to 15 minutes.
  4. While the pastry is baking, prepare the topping: In a saucepan, melt the butter over low heat. Add the almonds, candied peel, sugar, honey and vanilla extract. Heat just until the ingredients are incorporated.
  5. Remove the pan and spread the almond-honey mixture evenly over the pastry. Return the pan to the oven and bake until the topping is a deep gold, 12 to 15 minutes. Remove and transfer to a rack to cool in the pan. Once it has cooled, remove from the pan and cut into 32 squares. Store in an airtight container at room temperature for up to 3 days.

Makes 32 squares

NOTE: Whole, unblanched almonds can be finely ground in a food processor to make almond meal. To make vanilla sugar, cut 1 or several vanilla beans in half lengthwise, scrape out the seeds and reserve for another use. Dry vanilla bean halves at room temperature and place in a large jar of sugar. Store for several weeks to scent and flavor the sugar.

Nutritious life week at the Golden Door

Golden Door 11 6 13

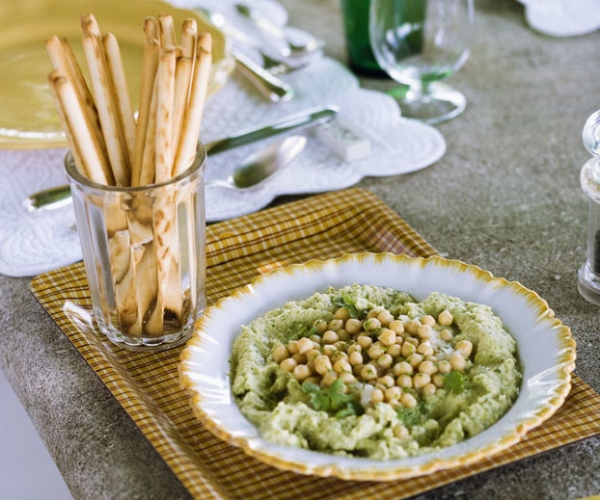
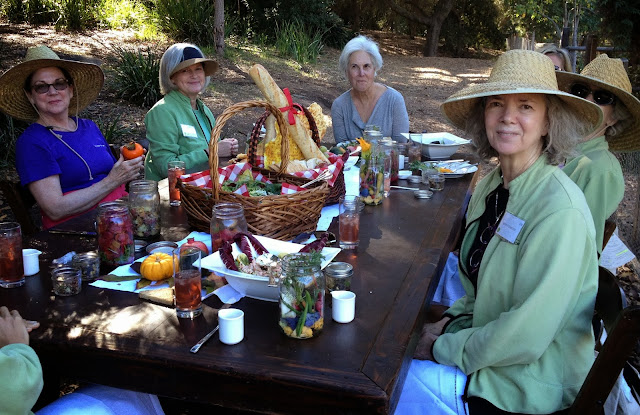
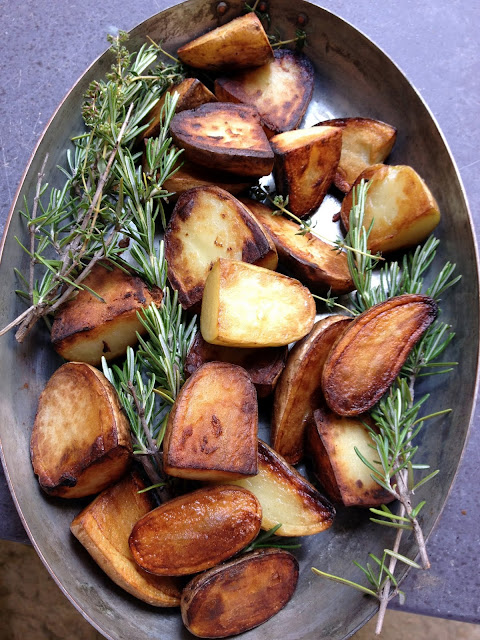
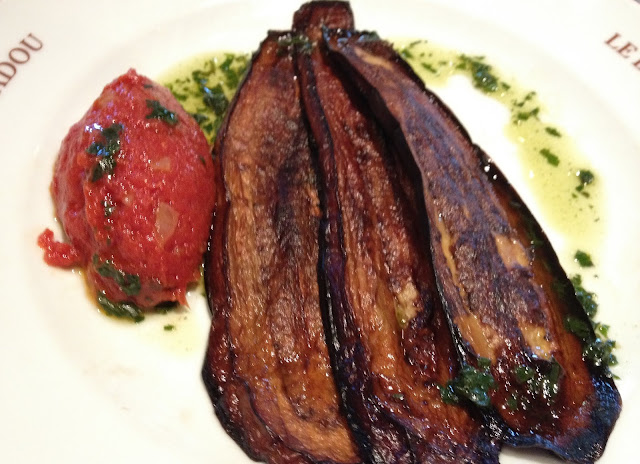
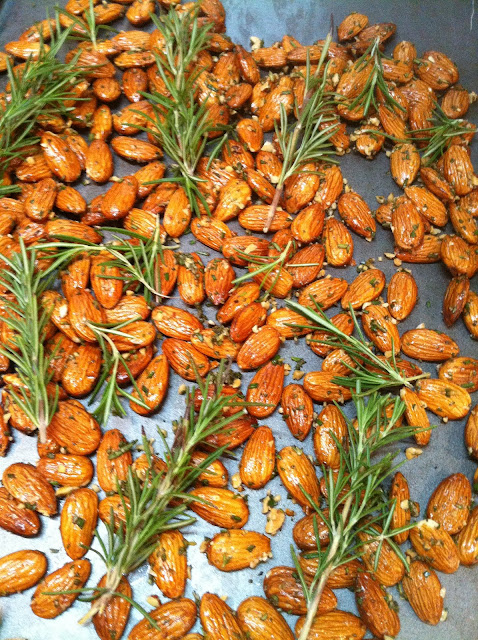
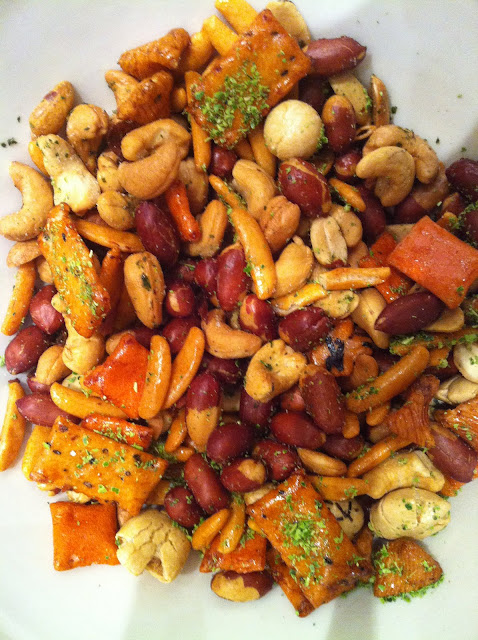
This week I have been fortunate enough to participate in Nutritious Life Week at the Golden Door Spa in Escondido, California. Along with 5-mile morning mountain hikes, classes in Fast Fit, daily workouts with my trainer, strenuous water aerobic classes, and daily tennis lessons, the days are sprinkled with massages, manicures, pedicures and facials. There is also time for me to talk to the guests about my own fitness program, my cooking, and signings for my new book, The French Kitchen Cookbook. Pictured above are a few guests enjoying the spa's first outdoor picnic, held overlooking the 3-acre organic vegetable garden, a paradise that right now is bursting with multiple varieties of beets, carrots, fennel, kale, society garlic, nasturtiums, oregano, and Mexican tarragon. Tonight, in our cooking class, we sliced many of these vegetables paper-thin, blanched them, then tossed them with an avalanche of herbs and a Yogurt, Lemon and Chive Dressing (recipe follows.) We also prepared a lighter variation of my Miniature Onion and Goat Cheese Appetizers, as well as Grilled Polenta Squares with Tomato and Onion Sauce, both variations on recipes from The French Kitchen Cookbook.

Yogurt, Lemon, and Chive Dressing

Equipment: A small jar, with a lid.

2 tablespoons freshly squeezed lemon juice

1/2 teaspoon fine sea salt

1/2 cup plain, low-fat yogurt

1/3 cup finely minced fresh chives

In a small jar, combine the lemon juice and the salt.  Shake to dissolve the salt.

Add the yogurt and chives. Shake to blend. Taste for seasoning. Store covered and refrigerated, for up to 1 week. Shake to blend again before using.

About 3/4 cups

Miniature Onion and Goat Cheese Appetizers

These tasty, savory, miniature appetizers are a huge hit in my cooking classes. There is always a great sense of satisfaction, when one removes a tray of these fragrant, golden nuggets from the oven. These are best warm from the oven but are also delicious at room temperature. They can serve as appetizers or as sides to a simple green salad.

Equipment: A food processor; 2 nonstick petit four molds or mini muffin tins, each with twelve 2  1/2–inch (6.5 cm) cups, or a 24-cup mini-muffin pan.

4 tablespoons extra-virgin olive oil

1 pound (500 g) onions, peeled, halved lengthwise, and cut into thin half moons

Fine sea salt

Coarse, freshly ground black pepper

4 ounces (125 g) soft, fresh goat’s milk cheese

Grated zest of 1 lemon, preferably organic

3 large eggs, preferably free range and organic lightly beaten

1 teaspoon fresh lemon thyme or regular thyme leaves

Fleur de sel, for garnish

  1. Evenly center two racks in the oven. Preheat the oven to 400°F (200°C).
  2. In a skillet, heat the oil over moderate heat until hot but not smoking. Reduce the heat to low, add the onions and a pinch of salt, and sweat – cook, covered, over low heat until soft and translucent – about 10 minutes. Season generously with freshly ground black pepper. Taste for seasoning.
  3. In the food processor, combine the goat cheese, lemon zest, eggs, and thyme leaves and process to blend. Add the cheese mixture to the onions in the skillet and stir to blend. Taste for seasoning.
  4. Spoon a tablespoon of the mixture into each mold or muffin cup.
  5. Place the molds in the oven and bake until the mixture is golden, 20 to 25 minutes. Remove from the oven and let cool slightly. Then remove them from the cups. Serve warm or at room temperature, sprinkled with fleur de sel.

Makes 24 miniature appetizers

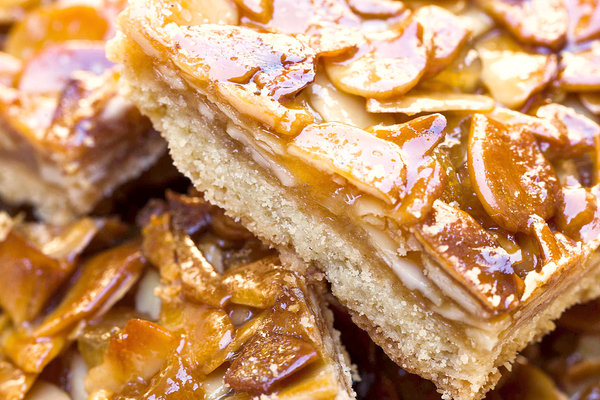
Wine suggestion: The mineral-rich flavors of this blend of Marsanne, Clairette, Ugni Blanc and Bourboulenc with their touch of spice make this white wine –Domaine du Paternel Cassis Blanc de Bancs -- a perfect palate opener to pair with the tatins.

Grilled Polenta with Tomato and Onion Sauce

This light, colorful vegetarian weeknight dinner is a favorite, and this soothing, comfort-food dish knows few rivals, particularly in cooler weather.

Equipment: A 1-quart (1 l) gratin dish, 4 warmed dinner plates.

3  1/2 cups (875 ml) 1 % milk

Fine sea salt

1/2 teaspoon freshly grated nutmeg

3/4 cup (135 g) instant polenta

1/2 cup (3 ounces; 90 g) freshly grated Gruyère cheese, plus extra for garnish

1 large onion, peeled, halved lengthwise, and cut into thin half-rounds

2 tablespoons extra-virgin olive oil

2 fresh or dried bay leaves

One  28-ounce (765g) can peeled Italian plum tomatoes in juice

Fresh, flat-leafed parsley leaves, for garnish

1. In a large saucepan, bring the milk, 1 teaspoon of the sea salt, and the nutmeg to a boil over medium heat. (Watch carefully, for milk will boil over quickly.) Add the polenta in a steady stream and, stirring constantly with a wooden spoon, cook until the mixture begins to thicken, about 3 minutes.

2.Remove from the heat. Add half of the cheese, stirring to blend thoroughly.  The polenta should be very creamy and pourable. Pour it into the gratin dish. Even out the top with a spatula. Sprinkle with the remaining cheese. Let sit at room temperature for about 30 minutes to firm up. (Or store, covered and refrigerated, for up to 3 days.)

3.Prepare the tomato garnish: In a large skillet, combine the onion, the olive oil, and 1/2 teaspoon of the sea salt and sweat – cook, covered over low heat until soft and translucent – about 5 minutes. With a large pair of scissors, cut the tomatoes in the can into small piece. Add the bay leaves and tomatoes and their juices and cook, covered, over low heat for about 15 minutes. Taste for seasoning.

4.At serving time, preheat the broiler. Cut the polenta into 8 even squares. Place on the baking sheet, cheese side up. Place under the broiler and broil until the cheese sizzles, 1 to 2 minutes. Transfer the squares to the warmed plates, stacking the second slice at an angle over the first. Spoon the sauce all over. Garnish with parsley and cheese.

4 servings

WINE SUGGESTION: An inexpensive everyday dish suggests an equally fine but gently priced wine. A favorite is Michel and Stephane Ogier’s La Rosine Syrah, a deep purple vin de pays from the hillsides north of the old Roman town of Vienne.

MAKE AHEAD NOTE: Both the tomato sauce and the polenta can be prepared up to 3 days in advance, then covered and refrigerated separately. Reheat at serving time.

THE SECRET: When using whole, canned tomatoes, use a scissors to cut the tomatoes into small pieces, making for a still chunky yet finer sauce.

A new way to love a tomato

Bristol Tomatoes 8 12

Tomatoes must be very happy. Everyone loves them. Craves them. I have always understood that the Japanese believe that the way in which you cut anything changes the flavor. I agree. Slice something too thinly and it looses its soul. Too thick and you miss the message. But at a celebratory lunch the other day on the new terrace of the the Bristol in Paris, with chef Eric Fréchon at the stove, my friend Susan Herrmann Loomis and I shared a landmark meal. There were many highlights, but as a cook and a  teacher, what I took away  was the "tomato corks" pictured here. I grow more than 20 varieties of tomatoes in Provence, and never tire of them, breakfast, lunch, dinner. I slices them thick and thick, make sauces, etc etc. But I have never seen them cut like this. After lunch, Susan and I emailed about how to do this at home. She was the smartest one who suggested an apple corer might be the right gadget. So I found a fabulous Zyliss apple corer that does a "twist and release" meant for the apple but even better for the tomato. There is no recipe here, but I will tell you what I have done: made tomato corks and drizzled them with olive oil and vinegar and salt, made them part of an antipasti platter paired with thin slices of ham, giant olives, slices of prosciutto, slices of mozzarella, pure heaven. I use any leftover tomatoes to make a tomato sauce. The best advice is to cut the top and bottom from the tomato and stick the corer into the tomato. Release each cork onto a thick layer of paper towels. Salt lightly. Then season and serve as you like!   Tonight I will serve a ravioli with that homemade tomato sauce and toss all of this with more tomato corks. To be continued! I have added the Zyliss apple corer to my Amazon Store if you want one!

For potato lovers: Johannes's potatoes

Potatoes Johannes 6 12

Potatoes Johannes

Golden brown, with a firm and crusty exterior, a smooth and creamy interior, these oh-so-easy potatoes have become a staple at our table.  The potatoes were part of a vegetable medley at a recent lunch with our cooking school students at Johannes Sailer’s Les Abeilles in the Provencal village of Sablet. I like to roast the potatoes on a bed of freshly harvested rosemary.

3 to 4 tablespoons chicken fat, duck fat, or olive oil

1 pound (500 g) firm, yellow-fleshed potatoes, such Yukon Gold (each about 4 ounces; 125 g), scrubbed but not peeled, halved lengthwise

Fleur de sel

Coarse, freshly ground black pepper

  1. Center a rack in the oven. Preheat the oven to 425°F (220°C).
  1. In a large skillet, heat 3 tablespoons of the poultry fat or oil over moderate heat until hot but not smoking. Add the potatoes and sear on all sides until a deep golden and well-crusted, about 15 minutes total, adding additional fat if the pan becomes too dry.  Season lightly with salt. Place a bed of rosemary in a roasting pan. Add the seared potatoes and roast until they can easily be pierced with a fork, 25 to 30 minutes. Season to taste and serve warm.

4 servings

Le Bistrot du Paradou secret revealed!

Paradou Eggplant Tomates Concassees 5 12

For nearly 30 years I have made regular pilgrimages to Le Bistrot du Paradou, where Mireille and Jean-Louis Pons held court, offering us incomparable local Provençal fare, from lamb to rabbit, garlicky aioli and tender roast chicken. Vegetable dishes are honored here, including golden slices of eggplant, always offset by this thick and shimmering tomates concassées, a thick tomato accompaniment glistening with the local oil from the cooperative in Maussane-les-Alpilles, studded with cubes of ruby tomatoes, bits of onion and fresh leaves of basil. Years ago I asked Mireille for the recipe, and she offered that off season she used canned tomatoes and in season usually a blend of fresh and canned. I spent endless hours attempting to recreate the sauce, never achieving any of the elegance of Mireille’s triumph. Mireille and Jean-Louis are no longer a presence in this always lively bistrot, but on my last visit longtime chef Vincent revealed the simplicity of the recipe: Canned diced tomatoes cooked long and slow, embellished with nothing more than the best olive oil, a touch of salt, onions, and basil. Success at last! The aroma that fills the kitchen as the fragrant olive oil hits the warm, thick sauce is worth the effort all on its own. In our house, a favorite use is as a topping for freshly toasted homemade multigrain sourdough bread.

One 28-ounce (765 g) can diced tomatoes in juice (do not drain)

4 tablespoons extra-virgin olive oil

1 small onion, minced

1/2 teaspoon fine sea salt

A small handful fresh basil leaves, chopped if large

In a large saucepan, combine the tomatoes, 2 tablespoons of the oil, the onion, salt, and basil. Stir to blend. Simmer, uncovered, over lowest possible heat, until most of the liquid has cooked away and the sauce is thick, 40 to 45 minutes. Stir regularly to prevent the sauce from sticking to the pan.  Taste for seasoning. While still warm, stir in the remaining 2 tablespoons of oil. Use as a vegetable garnish or as a  sauce for pastas or pizzas. (Store in an airtight container in the refrigerator for up to 3 days.)

2 cups (500 ml) sauce

Time for cooking classes in Provence!

Asparagus with Whipped Ricotta

I am looking forward to our opening  Provence session of At Home With Patricia Wells this Sunday, June 3. We have a full list of classes planned in June, July, September and October. While most of the sessions are fully booked, a few places are still open for the week of September 16 to 21, and we look forward to welcoming everyone then! You will find  full information on this page. To enroll, click here: patriciawells.com/cooking.

The following recipe is a brand new favorite, and one we'll be preparing in class next week:

BRAISED ASPARAGUS WITH WHIPPED RICOTTA, HAM, PARMESAN & HERBS

Braising asparagus --- cooking it in a small amount of liquid, covered  -- seems to bring out the vegetal qualities of this sublime vegetable. Adding a touch of fresh rosemary and bay leaf only intensifies its bright, herbal flavors. In this dish,  a white cloud of whipped ricotta adds a contrast of textures and colors, while a touch Parmesan, ham, and  a shower of fresh herbs turns this into a healthy Salad As A Meal.

Equipment: A heavy-duty mixer fitted with a whisk; a large skillet with a lid; 4 warmed salad plates.

The whipped ricotta:

2 cups (8 ounces; 250 g) best-quality sheep’s milk or cow’s milk ricotta

4 tablespoons whole milk

1/2 teaspoon fine sea salt

The asparagus:

16 plump spears (about 2 pounds; 1 kg) fresh green asparagus, trimmed

1 tablespoon extra-virgin olive oil

1 teaspoon coarse sea salt

Several bay leaves, preferably fresh

Several sprigs fresh rosemary

Zest and juice of 1 lemon

Fleur de sel

The garnish:

About 40 shavings (about 2 ounces; 60 g total) Parmigiano-Reggiano cheese

About 3 ounces (90 g) matchsticks of ham or sausage

Fresh thyme leaves, for garnish

Fresh parsley leaves, for garnish

Minced fresh rosemary, for garnish

1. In the bowl of the mixer, whisk together the ricotta and the milk until light and fluffy. Add the salt and whisk once more.

2. In a skillet large enough to hold the asparagus in a single layer, combine the oil, asparagus, oil, coarse salt, bay leaves, and rosemary. Add enough water to cover the asparagus by about one-third. Cover. Cook over high heat just until the oil and water mixture begin to sizzle.

3. Reduce heat to medium and braise the asparagus, turning from time to time, just until the vegetable begins to brown in spots and are offer no resistance when pierced with the tip of a knife, about 6 to 8 minutes. (Cooking time will depend upon the thickness of the asparagus.)  Shower with the lemon zest and juice.

4. Remove and discard the bay leaves and rosemary. Arrange 4 asparagus on each salad plate. While still warm, shower with the Parmesan strips, the meat matchsticks, and herbs. Place a scoop of whipped ricotta alongside the asparagus. Season lightly with fleur de sel. Serve immediately.

4 servings

THE SECRET: The words “serve immediately” are serious here: Once cooked, asparagus go limp rapidly. Much of the joy of this preparation is the crunch of the just-cooked vegetable, so take advantage of it.

Variation: Substitute yuzu juice and yuzu zest for the lemon, or braise with the addition of either fresh mint or rosemary, removing the herbs once the asparagus is cooked.

A food loving baker: Gontran Cherrier

Gontran Cherrier's Tart au Chocolat 4 29 12

Gontran Cherrier’s Tarte au Chocolat, Miel, et Noix

In researching The Food Lover’s Guide to Paris application for the iPhone, I kept returning again and again to baker Gontran Cherrier’s breads and pastries, all stand-outs, all delicious. This chocolat tart is totally decadent and totally delicious. A very slim wedge is truly satisfying.

8 ounce (250 g) all-butter puff pastry, thawed if frozen (see Note)

3 tablespoons (1 1/2 ounces; 45 g) butter

1/2 cup (3 ounces; 90 g) brown sugar

1/2 teaspoon fine sea salt

1 tablespoon (15 g) honey

3 tablespoons (45 g) maple syrup

2 tablespoons walnuts, coarsely ground

2 tablespoons almonds, coarsely ground

2 tablespoons hazelnuts, coarsely ground

2 tablespoons dried apricots, preferably organic, minced

2 tablespoons dried figs, preferably organic, minced

2 tablespoons candied lemon or orange peel, preferably organic, minced

1 cup (250 ml) heavy cream

8 ounces (250 g) bittersweet chocolate, such as Valrhona Guanaja 70%, broken into pieces

Equipment: A 9-inch (23 cm)  tart pan with a removable bottom.

Center a rack in the oven. Preheat the oven to 375 degrees F (190 degrees C).

Arrange the pastry in the tart pan, trimming the edges so that the pastry neatly fits the pan.

In a saucepan, combine the butter and brown sugar over low heat just until melted. Stir to blend. Stir in the salt, honey, and maple syrup. Spread the mixture over the bottom of the prepared pastry. Sprinkle with the nuts, and the dried and candied fruit.

Place in the center of the oven and bake the crust is dark golden and the topping is bubbly, 15 to 20 minutes. Let cool for 25 minutes.

Meanwhile, prepare the ganache topping. In a saucepan, heat the cream over moderate heat. Add the chocolate and stir to melt the chocolate. Stir to blend. Spread the ganache over the top of the tart. Refrigerate for 3 hours before serving, cutting into very thin wedges.

16  servings

Note: In France we use Marie’s all-butter puff pastry. In the United States, we favor Dufour brand frozen puff pastry, available at most Whole Foods grocery stores.

Gontran Cherrier’s treats can be found at two locations in Paris:

GONTRAN CHERRIER, 22 rue Caulaincourt, Paris 18

Tel : +33 1 46 06 82 66

Métro : Lamarck-Caulaincourt

Open: Monday, Tuesday, Thursday, Friday & Saturday 7.30am-8.30pm. Sunday 7.30am-7.30pm. Closed Wednesday

www.gontrancherrierboulanger.com

contact@gontrancherrierboulanger.com

GONTRAN CHERRIER (Wagram), 8 rue Juliette-Lamber, Paris 17

Tel : +33 1 40 54 72 60

Métro: Pereire or Wagram

Open: Monday, Tuesday, Thursday, Friday & Saturday 7.30am-8.30pm. Sunday 7.30am-7.30pm. Closed Wednesday

TO DOWNLOAD THE APP GO TO ITUNES OR VISIT MY WEB SITE

WWW.FOODLOVERSPARIS.COM

Daube au vine rouge: Best-ever beef stew

Beef Daube Rue du Bac Butcher 2 22 12

There is a story behind each recipe. This one has several. The last day of our last Provence class one September, I sent a student to the vegetable garden for salads and herbs. She came back screaming “Your garden has been destroyed, everything is in disarray.” Sure enough. Big chunks had been chewed from the pumpkins. Zucchini plants had been pulled out, salads trampled, there were crater-like holes everywhere. The wild boar had had a midnight party. I didn’t cry because we were leaving the next day and wouldn’t be back for several months. But I laughed when I saw that they had not touched the arugula or the shiso! No gourmets, those boars.  Fast foreward to Christmas: A neighbor who is a veteran hunter arrived at the door with a huge package of frozen wild boar, promising me that this was not the animal who had destroyed my garden. (How could he be sure?) I thought about re-gifting the creature but decided cooking it myself might be the best revenge. The daube was delicious.

Back in Paris, I decided to re-test the recipe with beef, and when I went to my local butcher and simply asked for 2 kg of beef for a daube, preferably two or three different cuts, he created a veritable still life. I arrived home with three cuts of beef, strips of caul fat, marrow bones and of course a garnish of fresh parsley! While the daube can be prepared with a single cut of meat, I like to use two or three, to allow for more complex flavors and textures. Careful searing of the meat is essential, to seal in juices. Flaming the wine adds another layer of flavor. A few marrow bones and strips of caul fat add a fabulous, silken texture to the final product. And while most French daube recipes recommend using either fresh tagliatelle or dried penne pasta, I prefer sheets of fresh pasta. They’re prettier on the plate, easier to eat, and more quickly absorb the silken sauce.

Equipment: A heavy-duty casserole with a lid; a 10-quart (10 l) pasta pot, fitted with a colander;  8 warmed, shallow soup bowls.

4 tablespoons extra-virgin olive oil

4 pounds beef (see Note) cut into 3-ounce (90 g) pieces

Fine sea salt

Freshly ground black pepper

1 bottle red wine, such as a Cotes-du-Rhone

1 quart (1 l) Homemade Chicken Stock (page 000)

2 large onions, peeled and halved  crosswise, cut into thin rings

4 carrots, peeled and cut into think rounds

4 fresh or dried bay leaves

2 tablespoons tomato paste

Several strips of caul fat (optional)

Several marrow bones (optional)

Final garnish:

2 tablespoons unsalted butter

1 pound (500 g) fresh mushrooms

3 tablespoons freshly squeezed lemon juice

5 ounces (150 g) pancetta, rind removed, cut into matchsticks

Eight 5-inch (12.5 cm) squares of fresh pasta

3 tablespoons coarse sea salt

Parsley leaves, for garnish

In the casserole, heat the oil over moderately high heat until hot but not smoking. Add several pieces of the meat and brown them over moderate heat, regulating the heat to avoid scorching the meat. Do not crowd the pan and be patient: Good browning is essential for the meat to retain flavor and moistness. Thoroughly brown the meat on all sides in several batches, about 10 minutes per batch. As each batch is browned, use tongs (to avoid piercing the meat) to transfer the beef to a platter. Immediately season generously with salt and pepper. Return all the meat to the casserole. Add the wine and bring to a simmer. Flame the wine to burn off the alcohol. Be very careful here: Be sure nothing flammable is near the burner. It will take about 4 minutes  to burn off the alcohol.

Add the stock, onions, carrots, bay leaves, and tomato paste. If using, add the caul fat and marrow bones. Cover and bring just to a simmer over moderate heat. Cook, covered, maintaining a very gentle simmer,  until the meat is very tender, 3 to 4 hours. Stir from time to time to evenly coat the pieces of meat with the liquid. The sauce should be glossy and thick. Taste for seasoning. (The daube can be prepared a day in advance, covered and refrigerated.) Reheat at serving time.

Prepare the mushrooms: In a large, covered saucepan, combine the butter, mushrooms, and lemon juice. Cover and cook over moderate heat until tender, about 5 minutes. Keep the mushrooms warm while finishing the dish.

Prepare the pancetta: In a large skillet with no added fat, brown the pancetta over moderate heat until crisp and golden, about 5 minutes. With a slotted spoon, transfer the pancetta to several layers of paper towel to absorb the fat. Blot the top of the pancetta with several layers of paper towel to absorb any additional fat.

Fill the pasta pot with 8 quarts (8 l) of water and bring to a rolling boil over high heat.  Add the coarse salt and the pasta, stirring to prevent the pasta from sticking. Cook until tender. Drain.

Transfer  a square of pasta to each warmed shallow soup bowl. Arrange several pieces of meat, the carrots, mushrooms and bacon on top of the pasta. Garnish with parsley. Serve.

8 servings

Note: Use two to three different cuts of beef here, choosing from the top or bottom round, heel of round, shoulder arm or shoulder blade, neck, or short ribs of beef.

Wine suggestion: I love an elegant Syrah here, such as  Domaine Vincent Paris’s ruby Cornas.

For the love of almonds

Rosemary-Toasted Almonds

Rosemary-Infused Almonds with Homemade Almond Oil

While preparing a cooking demonstration for the Google staff in San Francisco, the chef presented me with the most delicious homemade pistachio oil. He said he couldn’t readily find what I had requested, so prepared a batch himself! That put me in a creative mood, and now when the proper nut oil is not readily at hand, I make my own. Here’s a version I created using top-quality almonds. I use the oil to embellish all manner of foods, from braised asparagus to these toasted, herb-infused almonds.

Equipment: A small, nonstick skillet;  an electric spice mill; a baking sheet.

2 1/2 cups whole almonds, divided

1/3 cup neutral vegetable oil, such as grapeseed, peanut, or safflower

4 sprigs fresh rosemary, plus more for garnisH

1/2 teaspoon fine sea salt

1/2 teaspoon freshly grated lemon zest

  1. Center a rack in the oven. Preheat the oven to 350 degrees F.
  2. . Prepare the almond oil:  In the skillet, toast 1/2 cup of the almonds over moderate heat until toasty and fragrant, about 5 minutes. Toss from time to time to toast them evenly. Remove to a plate to cool. Once cooled, transfer the nuts to the spice mill and grind coarsely, to about the size of a small grain of rice.
  3. In a small saucepan, warm the oil. Off the heat, add the ground almonds and stir to blend. Set aside for at least 1 hour to infuse the oil. Transfer the oil and nuts to an airtight container and store in the refrigerator for up to 3 days.
  4. In a large bowl, combine the remaining 2 cups of almonds, 1 tablespoons almond oil (with the ground nuts), 1 tablespoon minced rosemary, the lemon zest and the salt. Toss to coat the nuts. Transfer to the baking sheet. Scatter with the whole sprigs of rosemary.
  5. Place the baking sheet in the oven and toast until fragrant and golden, about 5 minutes. Transfer to a bowl to cool. Once cooled, remove and discard the rosemary sprigs. (Store in an airtight container at room temperature for up to 2 weeks.) At serving time, garnish with fresh rosemary sprigs.

2 cups

Salad as a Meal has arrived!

Kauck_26R1644 Flammekuchen 2.jpg

I am delighted to announce the birth of my latest book, Salad As A Meal! To celebrate, I am sharing a favorite recipe from the  book, a lightened and updated version of the popular Alsatian Onion and Bacon Tart, known as Flammekuchen. While I prepare this with homemade bread or pizza dough, use your favorite recipe or purchased pizza dough.

Alsatian Onion and Bacon Tart: Flammekuchen

This is a memory lane recipe for me: when researching The Food Lover’s Guide to France in the early 1980’s, we found this fragrant onion and bacon tart on the menu everywhere in Alsace, and since then it has become a favorite bread tart. This is a lightened version, prepared with fromage blanc or with yogurt, rather than a richer heavy cream or crème fraîche. Likewise, the onions are steamed rather than cooked in fat, making for an ethereally light tart. Serve it with a simple green salad as a meal, with a glass of chilled Riesling.

Equipment: A baking stone; a steamer; a wooden pizza peel; a metal pizza peel or large metal spatula.

8 ounces large white onions, peeled and cut crosswise into 1/8-inch-thick rounds

4 ounces thinly sliced pancetta or bacon, cut into thin matchsticks

1/2 cup (150 g) whole milk Greek-style yogurt or fromage blanc

1/8 teaspoon freshly grated nutmeg

Flour and polenta for dusting

Coarse, freshly ground black pepper

1  package pizza dough for a 12-inch pizza , shaped into a ball

  1. Place the baking stone on the bottom rack of the oven. Preheat the oven to 500 °  F.
  2. Separate the onions into rings. The onions should yield about 4 cups loosely packed onions.
  3. Bring 1 quart of water to a simmer in the bottom of a steamer. Place the onions on the steaming rack. Place the rack over simmering water, cover, and steam until the onions are al dente 5 to 6 minutes. Remove the basket from the steamer to drain the onions.  (This can be done 2 to 3 hours before serving.
  4. In a large dry skillet, brown the pancetta over moderate heat until crisp and golden, 3 to 4 minutes. With a slotted spoon, transfer the pancetta to several layers of paper towels to absorb the fat. Blot the top of the pancetta with several layers of paper towel to absorb any additional fat.
  5. In a medium bowl combine the yogurt, nutmeg, onions, and half of the pancetta. Stir to blend.
  6. On a generously floured work surface, roll the dough into a 12- inch round.
  7. Sprinkle the wooden pizza peel with polenta and place the round of dough on the peel.  Working quickly to keep the dough from sticking, assemble the tart: Spread the yogurt mixture evenly over the dough. Sprinkle with the remaining pancetta.  Season liberally with pepper.
  8. Slide the dough off the peel and onto the baking stone. Bake until the dough is crisp and golden, and the top is bubbly, about 10 minutes.
  9. With the metal pizza peel or large spatula, remove the tart from the baking stone. Sprinkle generously with pepper.  Transfer to a cutting board and cut into 8 wedges.   Serve immediately.

One 12-inch tart

Wine suggestion: A young, fresh dry Alsatian Riesling is in order here: Try one from the reputable firms of  Ostertag or Zind-Humbrecht, crisp, dry, smoky wines with a saline touch of chalky minerality, an even match for the creamy onion and pancetta mixture offset with a hit of black pepper.

Note: If you don’t have a baking stone and a wooden peel, simply sprinkle the polenta on a baking sheet, place the round of dough on top, assemble the tart, and bake on the baking sheet.

Appetizing nuts for the holidays

Christmas Nuts

Asian Nut Mix with Kaffir Lime Dust

I am always on the lookout for unusual appetizers and this one brings back memories of travels to Vietnam, where kaffir lime and all varieties of  nuts -- especially peanuts --  appear freely and frequently. Kaffir lime trees grow easily, so if you live in a temperate climate, add one to your garden or patio. Fresh, frozen, and dried leaves can be found at Asian food shops. Fresh leaves, of course, are the most intensely flavored.

1 cup (4 ounces; 125 g) salted peanuts

1 cup (4 ounces; 125 g) cashews

Olive oil spray

12 kaffir lime leaves, chopped, then ground to a fine powder (2 teaspoons)

1 cup (2 ounces; 60 g) Japanese rice crackers

Equipment: A baking sheet.

  1. Arrange a rack in the center of the oven. Preheat the oven to 350 degrees F (180 degrees C).
  2. Combine the nuts on a baking sheet. Spray lightly with oil and toss to coat.
  3. Place the baking sheet in the oven and lightly toast the nuts,  about 5  minutes.
  4. Transfer the nuts to a bowl, and while still warm, add the kaffir lime powder and rice crackers and toss to blend. Taste for seasoning. Serve.

3 cups (310 g)

Discovering "sous vide"

CREA SOUS VIDE TURKEY

I just returned from a week-long professional course on sous-vide, a method of  cooking vaccum-packed foods at very low temperatures to capture maximum  flavor, texture, even color from an ingredient. And I’ll never be the same in the kitchen.

Sous vide has been around for more than 30 years (when I worked with chef Joel Robuchon at Jamin in the early 1980’s, he was already experimenting with the process) but is only beginning to catch on for the home cook.  

During the course,  given at CREA (Centre de Recherche et d’Etudes pour l'Alimentation) in Paris’s 14th arrondissement, we cooked salmon and cod, beef and lamb, kidneys and sweetbreads, pork roast, chicken breasts and thighs, duck breasts and foie gras, lobster and scallops, even an entire turkey in honor of Thanksgiving (see photo) Every vegetable imagineable – green beans, potatoes, carrots, artichokes, fennel, asparagus – was subjected  to our experiments. We even did tests with fruits, ranging from apples to pinapple to watermelon.

Sous vide (French for “under vacuum”) or cooking food at low temperature in a  water bath, is practiced by a number of  chefs world wide, including Robuchon, Thomas Keller, Ferran Adriá, Michel Richard, and Heston Blumenthal. Our CREA professor Bruno Goussault trained them all, so we knew that we were in good hands.

What I learned is that sous vide is NOT a replacement for traditional cooking methods – steaming, braising, searing roasting --  but an additional way to cook. Not every food improves with sous vide cooking but many ingredients do. Because ingredients are cooked to a perfect “core” temperature, meat and poultry remain perfectly ,evenly cooked throughout, with a texture that is unachievable in traditional cooking methods. Flavors that would normally evaporate into your kitchen, are preserved in that plastic bag. Artichokes cook without oxidyzing; a chicken breast comes out perfectly, evenly cooked, the same moist and appealing uniform texture throughout. I also learned that many items – particulary green beans and most green vegetable – are not suited to sous vide cooking for there is no way to maintain their brilliant green color. I also learned that this is not a process that is about convenience but rather precision, resulting in flavors that are more pure, more intense.

In future blogs I will go offer specific recipes and suggest how to purchase essential equipment (thermometers, water baths, and vacuum sealers) but for now I want to pass along a fabulous cooking tip that does not involve the sous vide process.

Whenever we cook salmon, a thick, viscous, white liquid (the albumin in the fish) appears on the surface of  fish once cooked. There is a way to block the alumin, and that’s salt. After soaking the fish in a simple salt brine (3/4 cup fine sea salt dissolved in  1 quart of water), cook the fish in your method of choice. You’ll be amazed! Here’s a favorite recipe for salmon:

Salt-Brined Six-Minute Salmon with Rosemary

A preferred  method for cooking fish is steaming. I like to steam fish on a bed of fragrant herbs --- rosemary, dill, thyme, or mint –all of which infuse the fish with their heady perfume. Garnish the fish with more minced fresh herbs, a drizzle of almond or  pistachio oil, and a few brine-cured black olives. Soaking the salmon in brine blocks the albumin, or white substance that rises to the surface of the fish.

Equipment: A tweezers; a steamer; 4 warmed dinner plates.

2 pounds fresh salmon filet, skin intact

3/4 cup fine sea salt

Several stalks of fresh rosemary (or sprigs of dill, thyme, or mint)

Finely minced rosemary (or herb of choice)  for garnish

Several drops of best quality almond oil or pistachio oil (such as Leblanc)

Fleur de sel  de Guérande

16 olives brine-cured black olives

  1. Run your fingers over the top of the salmon fillet to detect any tiny bones that remain in the salmon. With a tweezers, remove and discard the bones. Cut the salmon into four even, 8-ounce portions.
  1. In a large bowl, combine the salt and 1 quart of water and stir to dissolve the salt. Immerse the fish in the brine and set aside at room temperature for 10 minutes.
  2. Bring 1 quart of water to a simmer in the bottom of the steamer. Place the herbs on the steaming rack. Place the fish on top of the herbs. Place the rack over simmering water, cover, and steam just until the fish is cooked through, about 6 minutes.
  3. Remove from the heat and allow the fish to rest for 2 minutes. Carefully transfer the fish to warmed dinner plates. Garnish with herb of choice, a drizzle of the oil, and a sprinkling of  fleur de sel. On the side, garnish with olives and serve. 4  servings

Verona almond polenta cake

Verona Almond Cake

I have never entered a recipe contest in my life, but when I saw that Neff would be giving away an oven I have had my eye on for awhile, I thought I'd try. The oven is a dream, with a door that slides down inside the oven so it's not in the way, a low temperature setting for long slow roasting, special settings for bread and pizza, as well as an option for turning it into a steam oven! So I am entering one of my favorite desserts (and one that always gets raves from my students), the Verona Almond and Polenta Cake. With almonds, polenta, lots of butter, flour,  and a single egg, the mixture ends up much like dough a cookie dough, which is then dropped by little handfuls onto a parchment paper lined baking sheet. When served, the entire "cake" is brought to the table and guests simply break off a piece for pleasant feasting. If anyone wants to enter the Neff contest, visit neff-electromenager.com. Recipes must be sent by December 31. The oven of course is 220 and the site is in French. I'll let you all know if I win!

Almond Polenta Cake

Sbrisolona

It means a lot to say that this will be one of the most delicious tastes and textures you will put in your mouth in a lifetime. I first sampled this sandy cookie/cake/snack/dessert in a lovely Italian country restaurant near Verona – Osteria Valpollicella – one Saturday in March. This cake came as a surprising close to a splendidly modern lunch that included a pristine white ball of homemade cheese set atop the region’s spicy mostarda; paper-thin slices of home-cured beef; a stunning risotto laced with wild herbs and greens from the mountains; and a slab of local cheese teamed up with a mound of wilted wild greens and a crisp slice of grilled bacon. The recipe for this local specialty comes from Rosetta Gasparini, a fine cook who is part of the kitchen team at Villa Giona, owned by the Allegrini wine family. If you go into the town of  Mantua, you will hardly find a shop window that does not display this buttery, crumbly, irresistible cake. Traditionally, it is sampled with sweet local wines such as Recioto. Sbrisolona is a rustic dessert, baked as a slab on a baking sheet and set on the table as one whole piece. Guests break off an end and enjoy with a sip of sweet wine. I use salted butter for this cake, for I find it brightens the flavors.

Equipment: A food processor; a baking sheet lined with baking parchment.

8 ounces (250 g) whole unblanched almonds, reserving 10 almonds for garnish

2 1/4 cups (315 g) whole wheat pastry  flour

7/8 cup (105 g) quick-cooking polenta

2 sticks (8 ounces; 250 g) salted butter, melted

3/4 cup (150 g) vanilla sugar

1 large egg

1/2 teaspoon pure almond extract

  1. Preheat the oven to 350 degrees F (180 degrees C).

2. Toast the almonds: Place the almonds in a large, dry skillet over moderate heat. Shake the pan regularly until the nuts are fragrant and evenly toasted, about 2 minutes. Watch carefully! They can burn quickly. Transfer the almonds to a plate to cool. Set aside. (The almonds may also be toasted on a baking sheet in the preheated oven.)

3. In the bowl of a food processor, coarsely chop the almonds.

4. In a bowl, combine the chopped almonds, flour and polenta. Toss to blend.

5. In another bowl combine the melted butter, sugar, egg, and almond extract,  and stir to blend.  Add the dry ingredients to the liquid ingredients and stir to combine until the mixture is homogeneous. The texture should be like that of cookie dough.

6. Drop the mixture onto the baking sheet in handfuls, rubbing the dough between your fingers to make its characteristic uneven surface. Scatter the reserved whole almonds on top of the dough.

7.  Place in the center of the oven and bake until deep golden and crisp,  20 to 30 minutes. MAKE SURE THAT THE CAKE IS GOLDEN AND CRISP! THAT’S THE WHOLE POINT. Let cool before serving.  The crumbly almond cake is not cut with a knife but simply broken into pieces by hitting with your fist o breaking with your fingers.  It is ideally matched with a sweet red wine, such as Recioto, but can also be served with a generous sprinkle of grappa. The cake keeps well, and can be stored in an airtight container for up to one week.

40 servings

Greetings from the top of the world!

photo (3).jpg

Hello from my annual "boot camp" week at Rancho La Puerta in Tecate, Mexico. That's our group at 7 am this morning on a misty 7-mile mountain hike. I'll be sending notes and recipes from one of my favorite places in the world. No Côtes du Rhône, but plenty else! Here's a recipe inspired by the delicious, wholesome food at the Ranch, and one that's included in my upcoming book Salad As A Meal, to be published next spring.

EGG CREPE WITH MUSHROOMS AND SPINACH 

These ultra-thin egg crepes make a perfect lunch, accompanied by a simple green salad. The egg is simply a light envelope for whatever you want to put inside: Here I suggest mushrooms and spinach, but one could also dig into the pantry or refrigerator for all manner of herbs, vegetables, and cheese on hand.

Equipment: A 10-inch nonstick crepe pan.

2 teaspoons extra-virgin olive oil

6 large mushrooms, cleaned, trimmed, and thinly sliced

Fine sea salt

8 ounces fresh spinach

Freshly grated nutmeg

2 large, ultra-fresh eggs, at room temperature

2 teaspoons chopped mixed herbs (fresh parsley and thyme or dried oregano)

2 tablespoons freshly grated Parmigiano-Reggiano cheese, crumbled

Freshly grated pepper

Several handfuls of greens, tossed with dressing of choice

1. In a 10-inch nonstick skillet heat 1 teaspoon of oil over moderate heat. Add the mushrooms, season lightly with salt, and cook just until soft, 3 to 4 minutes. With a slotted spoon, transfer the mushrooms to a platter to drain. Add the spinach to the skillet with 2 tablespoons of water. Cover and cook until wilted, 1 to 2 minutes. Drain the spinach, chop, and season with salt and freshly grated nutmeg.

2. Crack each egg into a small bowl. The egg should be lightly beaten with a fork (not a whisk) just enough to combine the yolk and the white well without incorporating air bubbles that might make the crepe dry out. Add 1 tablespoon of water to each bowl.

3. Warm the crepe pan for a few seconds over high heat. Add 1/2 teaspoon of oil and swirl to evenly coat the pan. Add the egg, tilting the pan from side to side to evenly coat the bottom of the pan. Cook just until the egg is evenly set but still slightly liquid on top, about 1 minute. Remove the pan from the heat. Quickly spoon half the spinach, then half the mushrooms, herbs and cheese in the center of the egg crepe to form a strip parallel to the pan. With a fork, carefully fold the crepe over the filling from each side. Tip the pan up against the edge of a warmed plate so that the crepe rolls out browned side up. Season with salt and pepper. Repeat with remaining egg crepe. Serve immediately.

2 servings

Variations: Wilted Swiss chard and feta; wilted lamb’s lettuce and ricotta; salsa, cubed avocado and grated cheese; morels in truffle cream with chives.

Wine suggestion: Our winemaker Yves Gras makes one of the “best drying whites of the Southern Rhône,” or so says wine expert Robert Parker. We agree, for his Sablet Blanc Le Fournas  is crisp, chalky, elegant and made for everyday drinking. Perfect with this simple but sublime egg crepe.

A sweet, red-letter day!

Today at the Vaison weekly market, our beekeeper Christine Tracol cermoniously presented me with four 1-kilo jars of golden nectar. Last November she placed 10 busy beehives behind the little stone cabanon in our vineyard, and left them there until sometime this summer, when it came time for them to feast in the lavender fields near Mont Ventoux. But as our honey shows, as the bees feasted at Chanteduc  on the nectar of various rosemary, thyme, and zucchini blossoms, they must have spent a lot of time in the two giant linden flower -- or tilleul trees -- on the property. The honey is payment as "rent" for the use of the property. Nice exchange! Our honey is a golden amber, with an intense, floral flavor. I confess that it is not as extraordinary as her mountain lavender honey, but nothing is!   I'd like to share a favorite melon and honey sorbet recipe:

Cavaillon Melon Sorbet

A ripe, juicy melon emits the most intoxicating perfume. Even before the fruit is sliced open, it offers up its rich, pleasantly musky aromas. Choose a melon that feels heavy for its size, a sign that the fruit is dense and ripe. In Provence, the fashion is to offer melons that have exploded at the bottom – like a little volcanic eruption – a sign that the fruits were ripened in the fields and not waterlogged in a greenhouse to give better weight.  I like to sweeten this sorbet with a mild yet fragrant and distinctive honey. For a truly creamy, almost fluffy sorbet, whip the mixture in a blender at highest speed for a full minute.

One 2-pound (1 kg) ripe cantaloupe (to yield about 1 pound, 500 g fruit)

1/2 cup (125 ml)  honey

1 tablespoon freshly squeezed lemon juice

2 tablespoons vodka

Equipment: A serrated grapefruit spoon; a blender; an ice-cream maker.

Halve the melon. With the grapefruit spoon, remove and discard any fibrous pulp and seeds. Slice the halves into 4 wedges. With a sharp knife, run the knife between the rind and the pulp, being careful not to include any green bits of pulp. Chop the pulp coarsely. Transfer to the blender. Add the honey, lemon juice, and vodka and blend for a full minute, until creamy and  smooth. Chill thoroughly. At serving time, transfer the mixture to an ice cream maker and freeze according to the manufacturer’s instructions. For best results, serve the sorbet as soon as it is made.  Do not re-freeze.

3 cups (750 ml)

WHY VODKA? Without the added alcohol, this all-fruit sorbet would have a tendency to become gritty. The alcohol does not freeze, resulting in a smooth and creamy dessert.

Ohhh! Les Tomates!

I went a little crazy this year and ended up with 82 tomato plants. They are just beginning to come in now, and I believe that one NEVER has too many tomatoes. Should there be more than I can deal with, I quarter and freeze them, variety by variety, and cook them up later for multicolored sauces. Many of  my plants did not make it this spring, with too much rain and not enough sun. But there will be plenty to see us through to October. Current high performers include my favorites:  Green Zebra, the bright orange Valencia, Ida Gold and Coeur de Boeuf Orange, the yellow Jaune Saint Vincent and Banana Leg, the fabulous Ananas, Striped Germain and Tigerella, and the always productive Russe. A new and interesting heirloom is the white Beauté Blanche de Canada, a large tomato with ivory skin and pulp and mildly acidic flavor. I confess that I am nearly breathless with excitement when I can slice multicolored varieties and arrange them on a giant white platter, season them with my homemade Fennel and Saffron Salt and sit down to lunch, with a fat slice of my toasted homemade sourdough bread. I hope you enjoy the salt:  saffron, fennel and tomatoes seem to love one another's company.

FENNEL AND SAFFRON SALT

Once you try this on a simple fresh tomato salad, you will be sold! Fennel, saffron and tomatoes make a perfect trio. Keep the salt on hand for anytime you want to add sunny flavors. I use the less expensive ground saffron here. Once the salt dissolves, the saffron bleeds a golden, reddish orange hue.

A pinch of ground saffron

3 tablespoons fine sea salt

2 tablespoons fennel seed

Combine the ingredients in a spice grinder, grinding until the fennel seeds are very fine. Transfer to a small jar. Cover and shake to blend.  Store securely covered to maintain freshness. The mixture will stay fresh for several months.

5 tablespoons flavored salt

Zucchini blossom love

Last year my handful of zucchini plants produced almost no vegetables. Blossoms yes, but a paltry crop of zucchini.  Now that's pretty pathetic, because even non-gardeners know that zucchini grows like wildfire. So this year I overplanted in the zucchini department, and of course I have more than my family, houseguests, and neighbors can humanly consume. But in truth I grow zucchini for their welcoming, golden flowers. They greet you in the morning with a smile, their arms wide open. Before I go out for a morning run, I allow myself a quick tour of the garden, so as I run I can plan the day's menus, always dreaming up new ways to use up zucchini blossoms, which I consider a totally "free" byproduct of the vegetable garden. I chop them and toss them in a lunchtime frittata, stuff them with all manner of fillings -- leftover cheese, tabouleh, herbs and chopped zucchini -- and deep fry them,  give them a quick sauté, or gently steam them. I arrange them like spokes on a wheel for pizzas, paired with anchovies and capers, or arrange them on organic flour tortillas with cheese, tomatoes, and pickled peppers and set them on the grill. But the current favorite comes from zucchini blossom and pasta recipes inspired by good friends and colleagues Susan Herrmann (in her utterly complete Italian Farmhouse) and Johanne Killeen and George Germon (in their unbeatable On Top of Spaghetti). A mix of cubed zucchini, sliced blossoms, capers, black olives, and an avalanche of basil make for an idyllic July spaghetti sauce.

Spaghetti with Zucchini Blossoms, Zucchini, and Basil

Equipment: A food processor fitted with a small bowl; a large saucepan with a lid;  a 10-quart pasta pot fitted with a colander; 4 warmed shallow soup bowls.

4 cups loosely packed basil leaves

4 tablespoons olive oil

1 teaspoon fine sea salt

1 1/2 pounds fresh zucchini, trimmed and cut into a very fine dice

20 zucchini blossoms, cut into chiffonnade (4 cups loosely packed)

1 cup best-quality French brine-cured black olives, pitted and quartered

1/3 cup capers in vinegar, drained

1 cup freshly grated Parmigiano Reggiano cheese, plus more for the table

1 pound imported Italian spaghetti

3 tablespoons coarse sea salt

  1. Combine the basil, 3 tablespoons of the oil, and the fine salt in the food processor and puree.
  2. Heat the remaining tablespoon of oil in the saucepan until hot but not smoking. Add the zucchini and cook for 1 minute. Add the blossoms and cook for 30 seconds more. Add the olives, capers, half the cheese, and the basil puree and stir to blend.
  3. In the pasta pot, bring 10 quarts of water to a rolling boil over high heat. Add the coarse salt and the pasta, stirring to prevent the pasta from sticking. Cook until tender but firm to the bite. Remove the pasta pot from the heat. Remove the colander and drain over a sink, shaking to remove excess water. Immediately transfer the drained pasta to the sauce in the saucepan. Toss to evenly coat the pasta. Remove from the heat. Cover and let rest for 1 minute. Toss with the remaining cheese. If dry, add several tablespoons pasta water to moisten. Serve in the warmed bowls, passing extra cheese for garnish. 4 Servings